Slow Movement – Abs and Booty
Plan 1 is always there for you if you’d like to come back to it. The thing is the body adapts to everything. The best way to keep seeing changes is to change your program. By surprising your body with new programs, it will jumpstart your metabolism, and you’ll keep meeting your expectations.
Classes on our Youtube Channel
When I looked in the mirror, what I wished for, was for a tighter tummy, and well why not go for the 6 pack once in your life, right? I came up with these
“Yogalates Bootcamp: Abs & Booty”
Video link: https://youtu.be/EaNISKlkIw4
This video is just one sequence of every exercise described in this chapter. You can tailor it to your level and liking. For example, the first week you can do 3 sets of 10 repetitions, the 2nd week you can do 3 sets of 15 repetitions, the 3rd week you can do 3 sets of 20 repetitions, the 4th week 4 sets of 20 repetitions, …
If you’d like a daily video, to simply follow, like the one in plan 1. I suggest you follow “Yogalates – Core & Inversions”, if you’re not familiar with inversions, just go straight into shavasana when inversions start.
Get ready to feel your abdominals!
Pilates
Neutral Spine
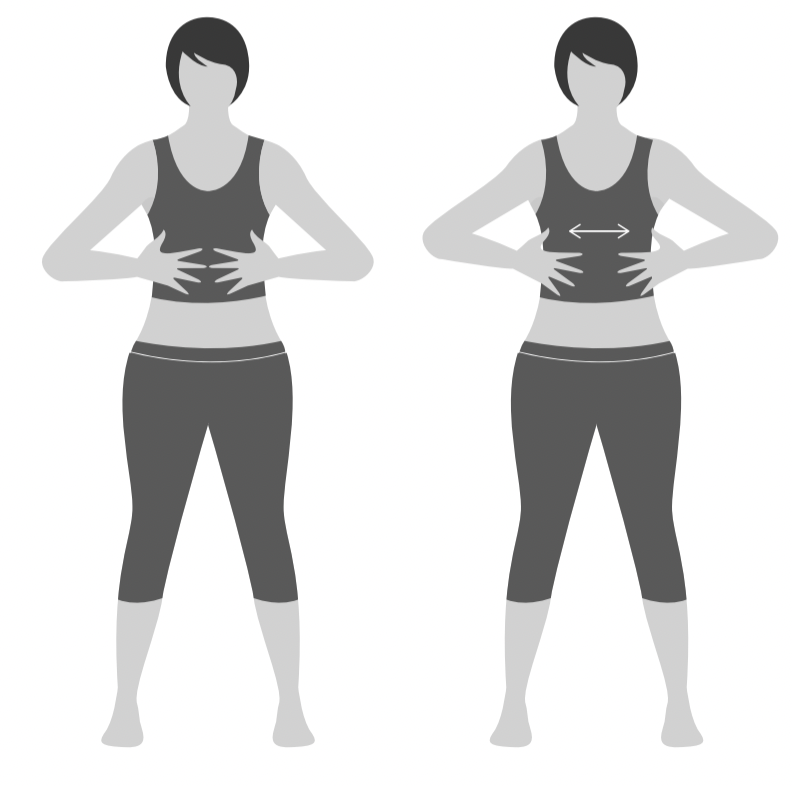
In standing position with legs hip-distance apart, arms resting at your side, shoulders relaxed. Place both thumbs on your hip bones, point your index fingers forward. I want you to imagine your fingers are the headlights of your car.
Tilt your waist forward. Your fingers will point towards the floor, as if lighting up the floor. Keeping your shoulders lifted and up, observe the position of your spine.
Tilt your waist to the back. Now the flashlights are pointing up, and lighting up the sky. Observe your spine position once more.
Neutral spine is halfway between those two points. Neutral spine is the position we want to hold while practicing Pilates.

Breathing
In Pilates, the breathing is extremely important. In standing position, hip-distance apart. Bring your arms up and place your hands flat on your upper rib cage, with your middle fingers touching. Take a deep breath in through your nose, feel the chest expanding. Exhale through your mouth, feel your chest contracting.
Fingers to touch. On every inhalation, breathe into the ribs, you’ll feel the fingers separate, about 1-centimeter. Exhale back to center. Practice this for 3 breaths.
Navel- Spine Connection
In the standing position, with your legs hip-distance apart. Place one hand on your belly, the thumb on your navel. Inhale through the nose, and exhale through the mouth while you push your transverse abdominal muscle in. Try to practice varying levels of activation. For example 100% – 70% – 50% and 30% activation.
On every exhalation, I’d like you to imagine there is a string going through your belly button towards your spine, and behind you is a Julie cartoon and she’s pulling on that string.
Inhale into the ribs, then contract your abdominals as much as possible, and bring that bellybutton as close to the spine as possible. Go from 100% – 70% – 50% – 30%, 30% activation that’s where we want to stay during our entire workout.
Actually this exercise can be performed in your daily life. When you’re driving, grocery shopping, walking the dog, … Think about that Julie cartoon, that’s pulling on that string, and activate your core. Releasing your lower back from any pressure.

When doing that we contract the transverse abdominal muscle (TVA), which acts like a natural corset. It holds the entire body together, all the while releasing your lower back.
Have you ever laughed so hard that your abs hurt? Then you’ve felt the TVA work. Make sure you laugh as much as possible! Ha!
Let’s work those ABS and let’s create that perfect BOOTY!!
Duration: 2 weeks
Repetition: 5:2
Do these exercises 5 days a week, take 2 days off during that week. Do this for the next 2 weeks.
CHEATSHEET
Neutral Spine
Breathing
Navel Spine
Cat Vomiting
Flying Dog – Variation: Table Crunches
1 min. Plank – Variations: Side / Low / side to Side
Myostatic Crunch
Roll like a Ball – Variations: High & Low Boat
Criss Cross
Reclined butterfly
Reclined spinal twist
Rotator cuff stretch
Lying cossack stretch
Bridge Pose
As you perform your workout, you’ll increase repetitions week after week. Start off with 10 of each, and 5 breaths for the stretches. Each following week add 5 repetitions more and build up your workout.
I like to see effort in colors, go from green, into yellow, orange, but stop just before you reach red.
MOVEMENT #1: THE VOMITING CAT
Start on all fours. Look at the floor directly under your head, or slightly in front of you. Keep your back relaxed (not etched, nor tense in the neck).
Exhale forcefully completely and bring the belly button to the spine.
Hold your breath for 8-12-sec, pulling your belly button towards your spine as hard as you can.
After holding your breath for 8-12sec, inhale fully.
Slowly exhale through the mouth, and inhale slowly through your nose (one breath cycle to rest).
Repeat 10 times.

Benefits: I found this exercise in Tim Ferriss’s book, the 4-hour body. He explains how to drop 10 kilos and uncover your 6-pack. You should already observe changes after just 3 weeks!
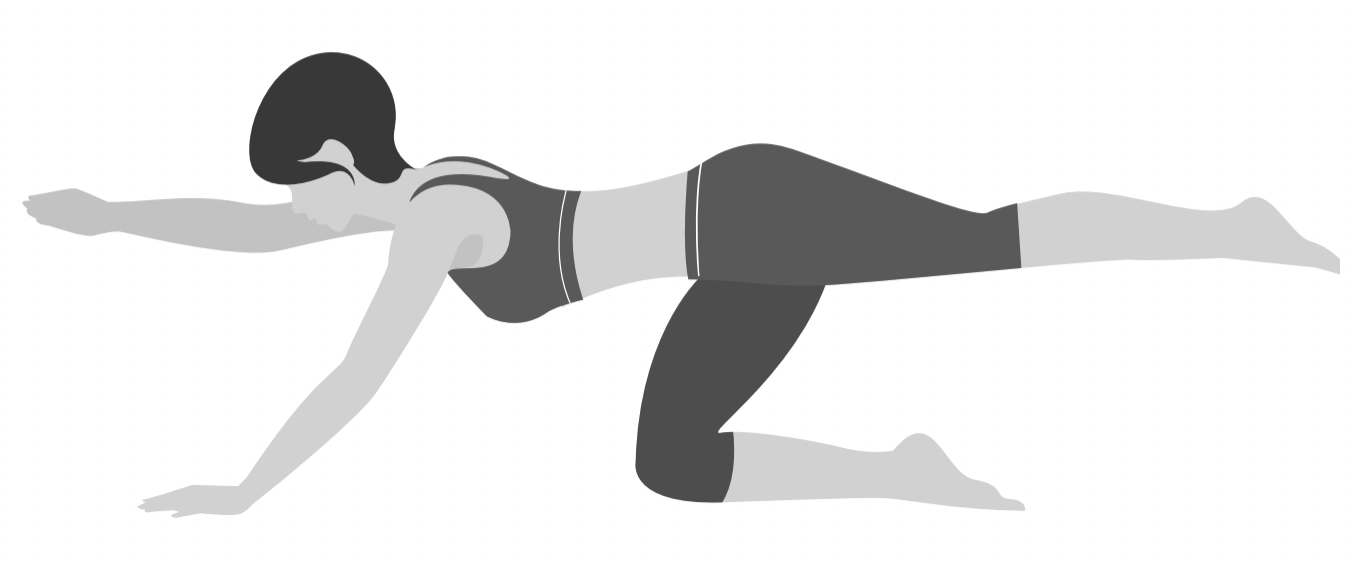
MOVEMENT #2: FLYING DOG / TABLE CRUNCHES
Start off on all fours
Knees bent and arms extended below the shoulders
Extend one arm parallel to the floor
Extend the opposite leg parallel to the floor
Hold for 2 sec and switch sides
20 repetitions
VARIATION
Add table crunch

Instead of increasing repetition week after week, increase the position held by 2 sec each week (2- 4- 6 – 8sec).
MOVEMENT #3: 1-min PLANK
Lie on your stomach, on your mat
Using your hands and toes, hold yourself up
Think belly button to spine, and push up towards your shoulders. Keep yourself straight like a plank. Think reaching forward with your head, and lengthening through your heels. If I come and place a glass of champagne on your neck, it will not spill. Keep it nice and straight, but do not overdo it, the neck is relaxed. Keep looking down in between your hands.
You can hold this position for one minute.
Grab your timer and start the stopwatch.
Variations are:
High plank (picture #…) 20-sec
Side plank (picture #…) 20-sec
Other side, side plank 20-sec
Low plank, moving from side to side 20-sec


Benefits: Plank is a full-body strengthener.
Feel free to start off with 30-sec planks—then you can increase the duration by 10-sec every week. On the second week you’ll be doing 40-sec, 50-sec on the third week, on week 4 you’ll be doing a full minute.
Remember to listen to your body. We want to challenge ourselves, but we don’t want to overdo it. Flexibility and strength are easy. Repetition is the key.
I like to see our effort in colors. We go from green, into yellow, through orange to reach red. Red is not good—we don’t want to hurt ourselves. Accompany yourself from green, to yellow, into orange. Then with repetition, you’ll see that that red limit moves more and more backward. Just keep training! You’ll get there!
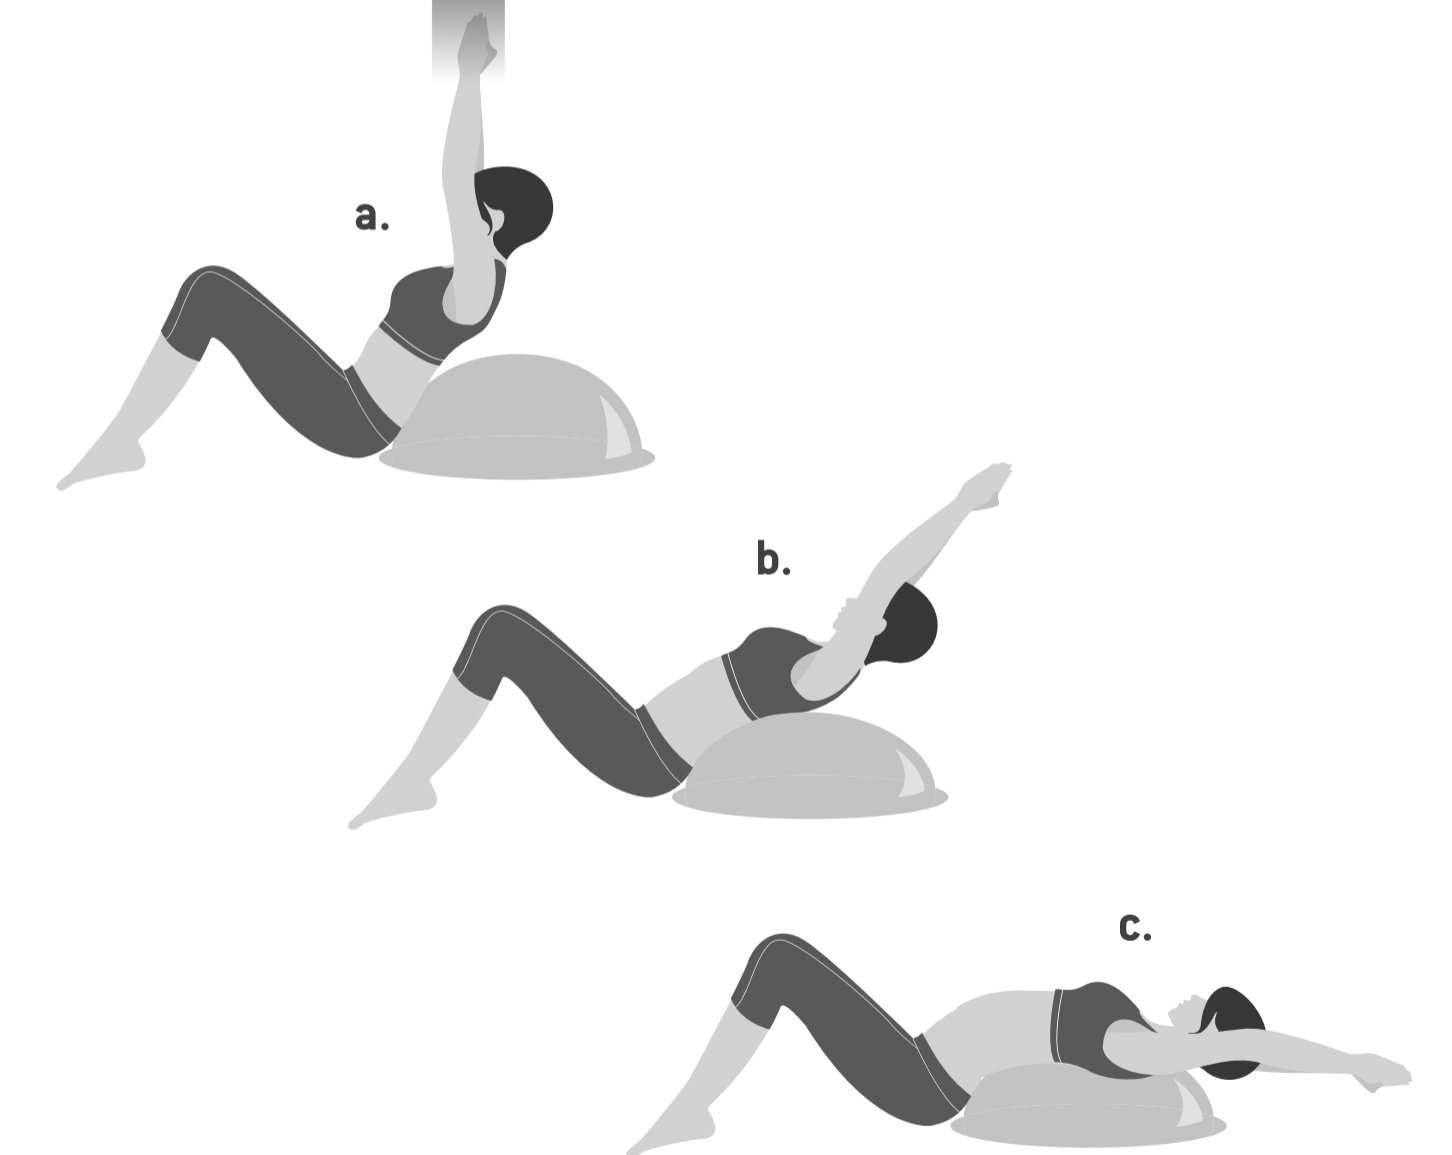
MOVEMENT #1: THE MYOTATIC CRUNCH
You’ll need a pile of firm cushions / a pilates ball (link- buy ball online on our website @slowretreats)
Start sitting on your ball/cushion pile. Your booty should be about 15-centimeters from the floor. Extend your arms alongside your ears, as high as possible, then overlap your hands, as if you were going to dive into the ocean). Arms should be behind or next to your ears for the entire exercise. (picture #…)
Focus on your abdominals. Inhale into the ribs. Exhale and squeeze those abdominals. While gently lowering your upper body backwards, for 4 sec – for 3 – for 2 and 1.
If you can touch the floor with your fingers. Otherwise, wherever you feel like holding is the right position. Hold for 2-sec. We are aiming here for maximum elongation, which will enable you to achieve a stronger contraction. (picture #..)
Inhale to prepare, exhale and contract the abs, gently come up with control. When you reach the top, pause for 2-sec. Arms extended along your ears, not exceeding perpendicular position with the floor.
Repeat 10 times. When you can complete 10 repetitions, you can add some water bottles/ books/ weights. Females should not exceed 4.5kilos.
MOVEMENT #4: ROLL LIKE A BALL
Starting in the sitting position on the mat.
Feet down, with your arms at the side and your hands flat.
Slowly curving your lower spine and rolling back to place your body weight gently down onto your lower arms and elbows. Activate Navel Spine and roll back up in one movement.

VARIATIONS:
HIGH BOAT
LOW BOAT

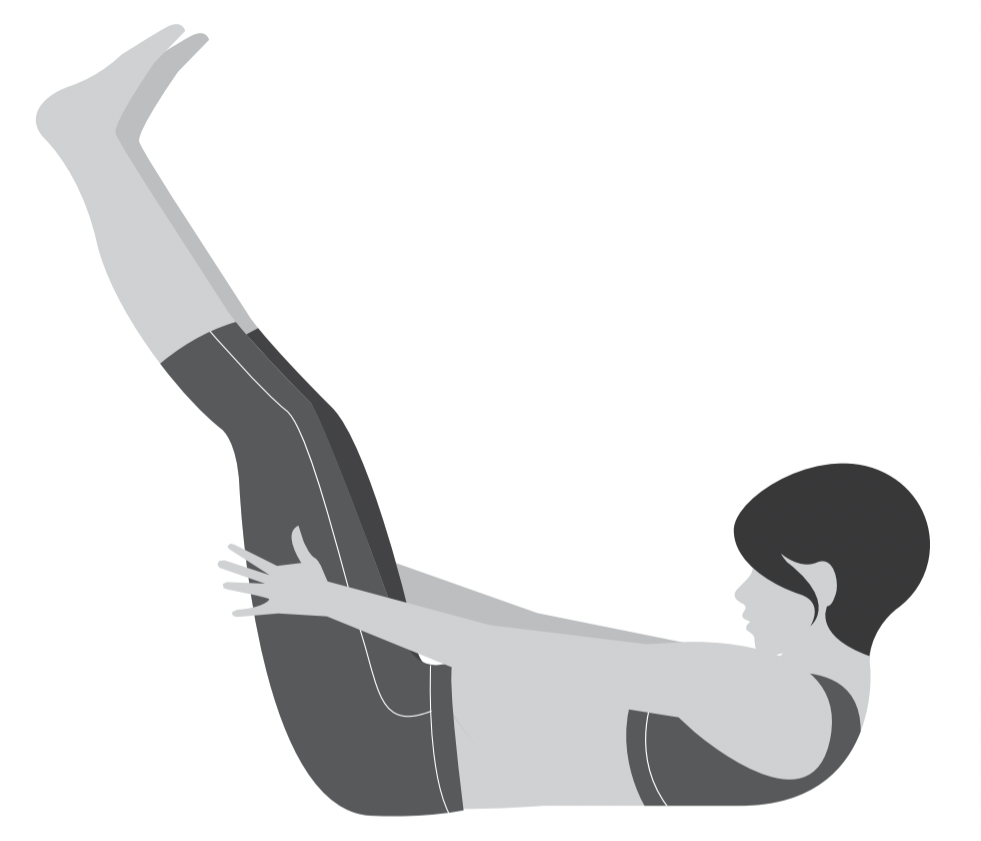
MOVEMENT #… : CRISS CROSS
Lying supine on the mat, hands interlaced behind the head. Legs in tabletop position. Carefully lift your head up into the air. Extend one leg out at 70° whilst twisting your upper body to the opposite side that your leg is extended to. Then change to the other side and repeat.

MOVEMENT # : P100
Lying supine on the mat. Legs extended upto 70° and arms rested at the side. Slowly lift your head off the mat and raise your arms up alongside your body. Begin to inhale, 5 short breaths through the nose and exhale 5 short breaths out the mouth. Pulse your arms at the side in time with your breathing.
COOLDOWN
RECLINED SPINAL TWIST
A twist is an easy way to give us instant energy lift. It is a safe, healthy way to decompress the vertebrae. Our energy can flow better, because we lengthen the spine and get space between the bones.
It will improve breathing, ease neck and back tension, and soothe exhausted nerves.
RECLINED BUTTERFLY

Ideal for relieving symptoms of mild depression, stress, menstrual cramps, and menopause. You’ll stretch the inner thigh, the groins, and the knees. It will improve your general circulation,and your heart. It’ll stimulate your kidneys, bladder, prostate gland, and the ovaries.
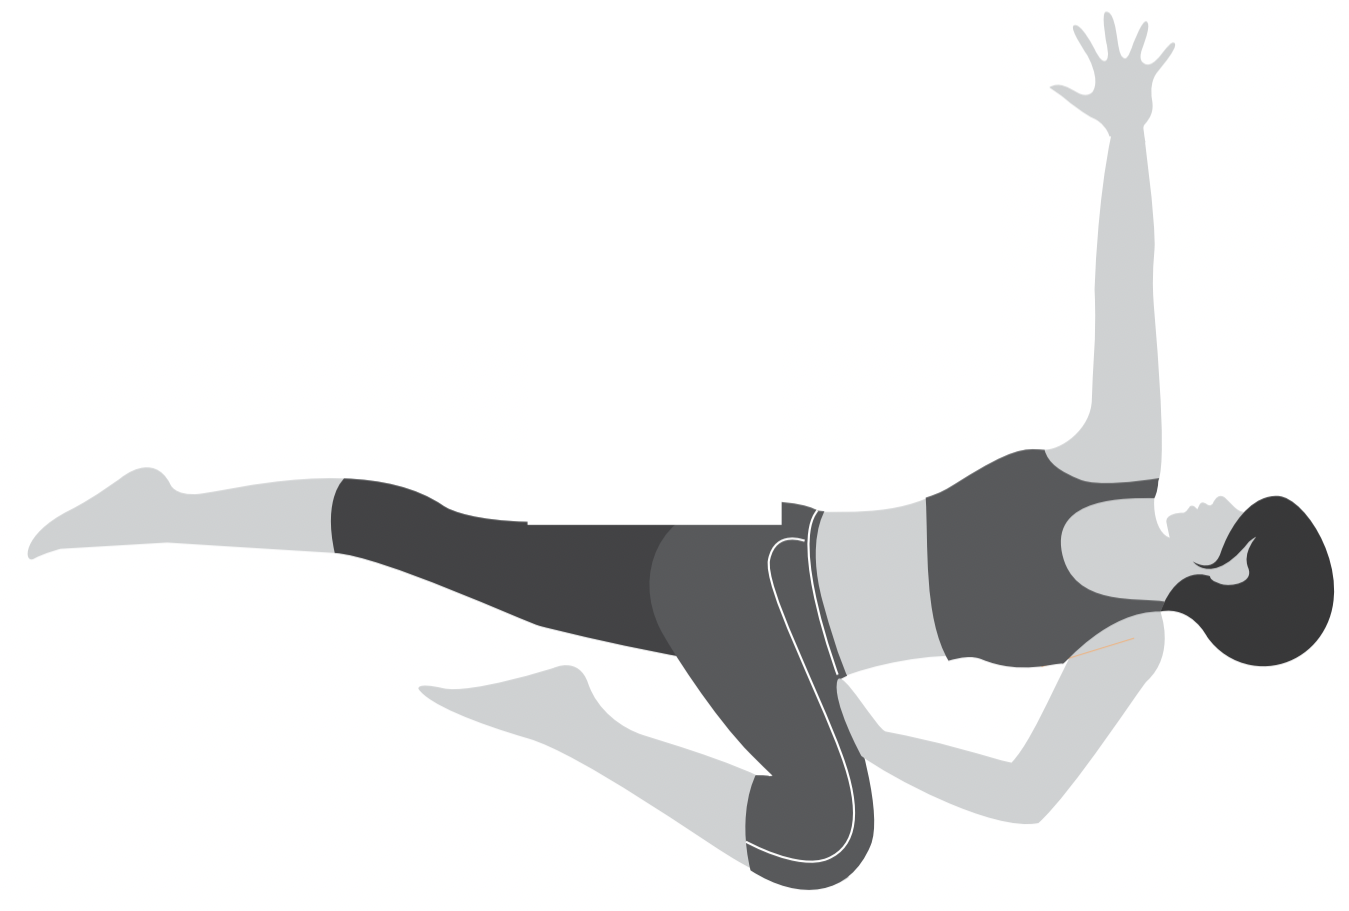
BRIDGE
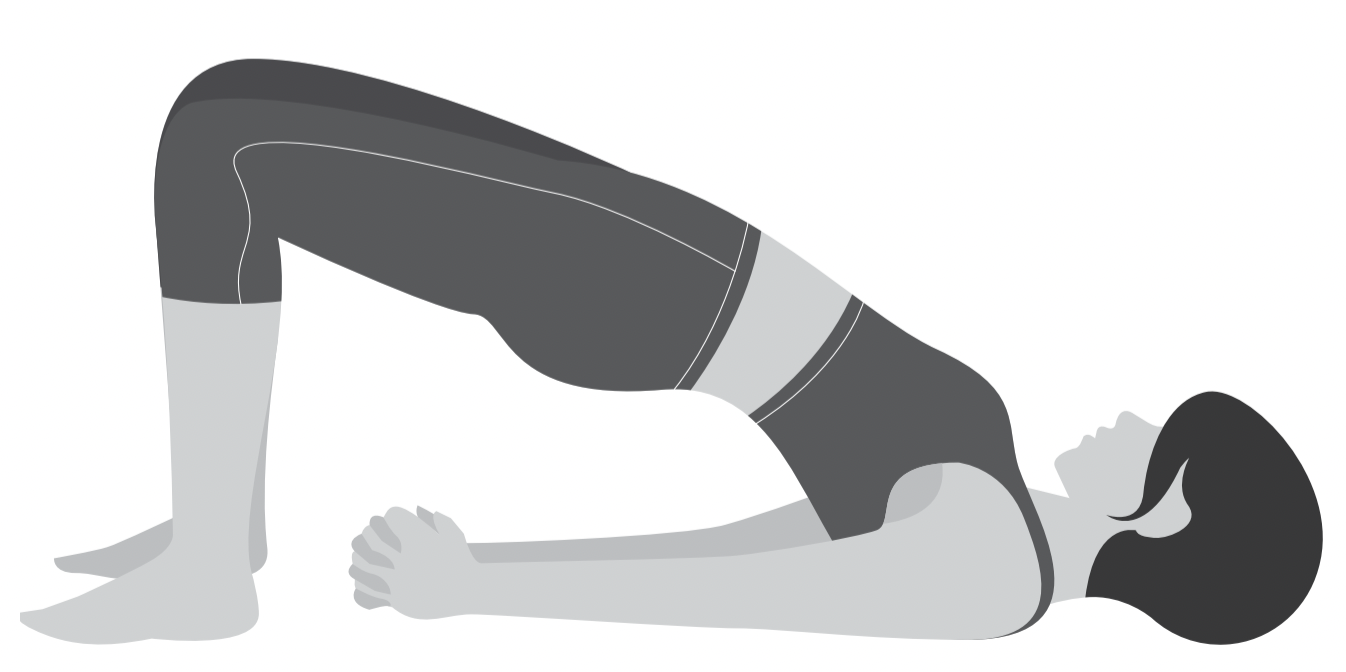
Bridge pose improved digestion, stimulates the thyroid glands, the abdominal organs, and the lungs; it calms the central nervous system, and the brain. You’ll stretch the neck, your chest, and hips. You’ll strengthen your hamstrings, buttocks, and back. It improves circulation.
I like to inhale up on my toes, and exhale down to my heels, the up/down motion of the feet, massages your shoulders.

